
I see some 2 ohm 5.25 inch motorcycle speakers online. Do you think would they work with the factory system? My original speakers are still good but I'm guessing that eventually they'll need to be replaced.
https://www.ebay.com/itm/Kicker-Motorcy ... aker&rt=nc
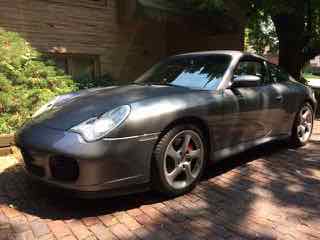
My 2002 996 "renovation" thread
-
B3DAWG

- OG (First 100 Outposters!)
- Posts: 1659
- Joined: Sun Jan 07, 2018 11:46 am
- Location: Gawga DAWG Country
Re: My 2002 996 "renovation" thread
Good find! And yes, they'll work, but look at the price. It's $225 for the pair. At that price, you're better off purchasing the OEM replacement at $50 each. (See attached pictures) Also, those motorcycle speakers don't have the bass range as normal kicker 5.25 speakers, but they'll work.wyovino wrote: ↑Wed Jul 18, 2018 7:41 am I see some 2 ohm 5.25 inch motorcycle speakers online. Do you think would they work with the factory system? My original speakers are still good but I'm guessing that eventually they'll need to be replaced.
https://www.ebay.com/itm/Kicker-Motorcy ... aker&rt=nc
- porsche996_speaker_diagram.jpeg (51 KiB) Viewed 2948 times
- porsche996_speakerprice.jpeg (60.27 KiB) Viewed 2948 times
-
B3DAWG
- OG (First 100 Outposters!)
- Posts: 1659
- Joined: Sun Jan 07, 2018 11:46 am
- Location: Gawga DAWG Country
Re: Googly Eyes
This has been on my list for a while, but since I haven't driven much at night in the car, it wasn't high priority. The passenger head light is way off. Points high. At first, I thought it was the xenon beam by itself that needed adjustment, but after a closer look, I noticed that one of the previous owners removed the mounting tray. This tray not only acts as the primary mount for the light enclosure and washer connection, but also an additional adjustment of the front head light. You can only adjust the HID beam so far. Of course, adjusting the mount (i.e. tray), affects the low and high beams.
Unfortunately, the previous owner removed the tray and couldn't figure out how to properly reinstall it and as a result the light didn't fit snug and the low xenon beam pointed high. Can you imagine approaching my car at night? No wonder people have been flashing their high beams at me!
If you ever need to remove this mount or make adjustments to the three primary bolts (see pic), don't be a fool and just start loosening the bolts with no rhyme or reason. You'll get the light so far out of adjustment, you'll have to spend a whole day going back and forth trying to get it right! Remember, when you make the adjustment, you have to reinstall the light to see how much additional adjustment is needed. It's a long process of back and forth. As mentioned, it has three point adjustments (notice arrows). Two in the front and one in the back.
The previous owner didn't install the lower bolts (located at the yellow arrows) correctly. I'm surprised the light didn't fall off going down the road. Its obvious the person got lazy and just put it back as quickly as possible. Unfortunately, the ONLY way to access the lower bolts is by removing the front bumper and air ducts. Took lots of time, but I forced myself to be patient and refer to the other light and shop manual diagram. After much work, it went back on correctly. Now all I have to do is fine tune the xenon beam.
- 996lightlevel.jpg (128.65 KiB) Viewed 2927 times
Last edited by B3DAWG on Mon Jul 23, 2018 8:43 am, edited 1 time in total.
-
32wildbilly
- Never gonna run around and desert you
- Posts: 5782
- Joined: Sat Jan 06, 2018 2:46 pm
- Location: Kneebraska
Re: Googly Eyes
Well one good thing is "they" didn't try to glue the mounting tray nor the headlight back in. Count your blessings!b3freak wrote: ↑Mon Jul 23, 2018 6:32 am This has been on my list for a while, but since I haven't driven much at night in the car, it wasn't high priority. The passenger head light is way off. Points high. At first, I thought it was the xenon beam by itself that needed adjustment, but after a closer look, I noticed that one of the previous owners removed the mounting tray. This tray not only acts as the primary mount for the light enclosure and washer connection, but also an additional adjustment of the front head light. You can only adjust the HID beam so far. Of course, adjusting the mount (i.e. tray), affects the low and high beams.
Unfortunately, the previous owner removed the tray and couldn't figure out how to properly reinstall it and as a result the light didn't fit snug and the low xenon beam pointed high. Can you imagine approaching my car at night? No wonder people have been flashing their high beams at me!
If you ever need to remove this mount or make adjustments to the three primary bolts (see pic), don't be a fool and just start loosening the bolts with no rhyme or reason. You'll get the light so far out of adjustment, you'll have to spend a whole day going back and forth trying to get it right! Remember, when you make the adjustment, you have to reinstall the light to see how much additional adjustment is needed. It's a long process of back and forth. As mentioned, it has three point adjustments (notice arrows). Two in the front and one in the back.
The previous owner didn't install the lower bolts (located at the yellow arrows) correctly. I'm surprised the light didn't fall off going down the road. Its obvious the person got lazy and just put it back as quickly as possible. Unfortunately, the ONLY way to access the lower bolts is by removing the front bumper and air ducts. Took lots of time, but I forced myself to be patient and refer to the other light and shop manual diagram. After much work, it went back on correctly. Now all I have to do is fine to the xenon beam.
- c06693a48f42a71502f57cd5b2328dc0.jpg (43.95 KiB) Viewed 2923 times
Never gonna make you cry...

Re: My 2002 996 "renovation" thread
Are all of the previous owner's service records from Pep Boys?
Understeer: You will hit the wall with the front end.
Oversteer: You will hit the wall with the rear end.
Horsepower: How hard you will hit the wall.
Torque: How far you will move the wall.
Gone hunting with Alec Baldwin and Dick Cheney. Back soon.
-
DBJoe996
- OG (First 100 Outposters!)
- Posts: 161
- Joined: Thu Feb 08, 2018 10:47 am
- Location: Ormond Beach, Florida, USA
Re: My 2002 996 "renovation" thread
I was going to mention the "glued in" thought as well. Someone beat me to it.
-
32wildbilly
- Never gonna run around and desert you
- Posts: 5782
- Joined: Sat Jan 06, 2018 2:46 pm
- Location: Kneebraska
Re: My 2002 996 "renovation" thread
True this! I know someone who works at WallyWorld, gets a discount and won't let them touch her car.
Never gonna make you cry...
-
FRUNKenstein
- Curator Extraordinaire
- Posts: 3955
- Joined: Fri Jan 05, 2018 11:02 pm
- Location: Wheat field, dammit, wheat!
- Contact:
Re: My 2002 996 "renovation" thread
Heh, heh, this could get fun . . .
- untitled.png (353.99 KiB) Viewed 2903 times
www.kansascityautomuseum.com
Current:
2002 996TT X50, Guards Red
1987 928S4, Guards Red
1987 951, Guards Red
1973 914 2.0 Bahia Red
2006 955S, Lapis Blue
Other toys:
1988 BMW 325i Cabriolet, Alpin Weiss
1987 Bertone X1/9, Verde Chiaro
Gone but not forgotten: 1975 914 2.0, Laguna Blue; 1999 996 C4 Aerokit Black; 1990 964 C2 Guards Red; 2006 955S Arctic Silver