1. Here is our starting point. On cold starts, my starter gear would not disengage quickly enough and make a godawful noise. I gave the mechanism a quick visual inspection to make sure nothing appeared to be damaged.

2. We will start by removing the motor housing. You will need to remove these two 7mm hex head screws and the 13mm nut holding on the ground wire.

3. We will now need to remove what I'll refer to as the "plunger assembly". I will pretty much garuntee that you will need to bust out your drill bits to remove these screws. You can either drill the heads off, or use an extractor. I opted to use an extractor, which removed them with no drama. You'll want to order new 5mm flat head screws. Overall length is roughly 33mm.


4. Once you get the plunger assembly housing off, this is what you'll end up with. By this point, it should be a little more clear on how the gear disengages. Don't loose the little rubber L piece!


5. I started by cleaning the plunger assembly and re lubricating it. All of the grease on my plunger was solidified and was "sticking." I cleaned off moving surfaces with brake cleaner and used high temperature grease as replacement.

6. I'm using Mobile SHC 220 high temperature grease, since it's what I had. What's important here is that you don't go crazy with the grease. Less is more, and a light film is all you should need.

7. Moving onto the planet gear assembly. If the "cap" for it is still stuck in the motor housing, you can remove it using a 90 degree pic. If your cap came out with the assembly like mines did, you can lift it straight off.

8. The ring gear has three rubber feet that friction fit and can be easily pried out. I gave this a good cleaning with brake clean and wiped out the teeth. I repeated this process with each of the planet gears, gun gear (which is inside the motor housing), and the planet gear carrier.


9. I did not disassemble anything beyond this. What I did for this spline area was wipe it as clean as I could get, then reapplied a new moly grease.

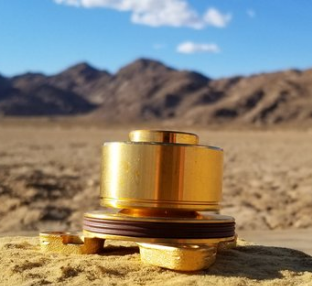
10. The last place you'll want to clean and add a little bit of grease is at this nose cone. I cleaned out the dried up white lithium grease and applied a very light coat of grease. Just enough so that the lip seal isn't going to get torn up on a dry shaft.

11. By this point, everything should be ready for reassembly. For reference, this is what my planet gear assembly looks like after regreasing. You don't want to pack this with grease, as there is a brushed motor in the housing. There is no seal between the planet gears and motor. You may want to add a light coat of grease to the motor shaft as well.

12. To reassembly, I recommend that you put the long screws through the body of the housing, and use it to keep your mechanism aligned as you put everything back together. Here, you can see the threads of the screws protruding through, and the note the notch on the starter housing. The notch needs to align with the rubber L. Make sure you install the plunger assembly before sliding the motor housing on all the way. You will not be able to get the plunger into the fork lever if you install the motor housing first.

13. Here is everything back together with the new fasteners.


Here are the fasteners I ended up using for the plunger assembly.